At Linchpin we’ve been utilizing an automated/continuous deployment strategy for quite a while now. After some trial and a lot of errors, we came up with a solution that others may find useful if they use WP Engine as their managed hosting provider. It may seem like a lot of steps, but once you understand the systems at play, you’ll realize that the setup is not all that difficult and this tutorial is pretty granular to help beginners get setup. Your results may vary!
Skip Ahead to the Good Stuff
If you are like me and you want to get right to business, you can head over to the script and a more succinct version of the docs on github.
Still Here? Great! Here’s what you’ll learn:
Within this walk through you’ll learn the entire deployment process we utilize at Linchpin. You can use the menu below to skip around if needed.
- Why Did We Create This Script?
- Understanding .git Push On WP Engine
- Linchpin Solution
- Setup Your Code Repos
- Connecting Your Repos to Codeship
- Environment Variables
- Deployment Pipeline(s)
Why? Understanding Our Deployment Challenge(s)
…projects could have 2 – 10 code repos…
Our team at Linchpin has multiple designers, developers, project managers and product owners. Each have varying levels of access to project repositories and have different “sprints” running; This creates a challenge where we need our themes and plugins broken down into separate repos. Linchpin projects will typically have anywhere between 2 and 10 code repositories depending on complexity. This walkthrough is geared towards developers that use multiple repos, but it does work just as well for single repos.
Understanding How .git Push Works With WP Engine
![]() WP Engine has stellar support for .git deployments out of the box.
WP Engine has stellar support for .git deployments out of the box.
WP Engines solution works really well if you are tracking your changes in a single .git repo for your site (ex. theme files) and/or keep all non WordPress core files (including plugins) within that same repo. If that is how you work, you really do not need this tutorial. Linchpin’s specific workflow presents a challenge on how .git push works with WP Engine. At first glance, it appears the solution provided by WP Engine for .git push does not support deploying multiple repos (to separate plugin and theme development) in a clean way. Unless you understand how it works just beneath the surface.
WP Engine’s .git deployment can be considered a middle man between what is stored within your project repo(s) and what you see in your webroot when you log in via SFTP. When you utilize the .git push functionality of WP Engine, WP Engine runs through an automated “build” process to validate what is happening (including some php syntax checks) and once those checks are complete, if successful, the system will then replace any files currently within the web root with the new contents of the git commit/push at the time of deployment (it will also add new files as needed).
It’s useful to understand that portion of the setup before we get started because it will make the process clearer as you go through this tutorial.
Linchpin’s WP Engine Deployment Solution Using Codeship
You can run this script with a simple server, Codeship or another CD service of your choice.
 There are a ton of services out there for Continuous Implementation and Continuous Delivery/Deployment, at Linchpin we use Codeship. The underlying idea works with others such as Deploy bot, CircleCI, etc.
We’ve created a handy shell script that is shared on github that can help streamline this process. If you want to just get down and dirty (or clean and automated).
Some Assumptions Before We Get Started
- You have a basic understanding of .git and have committed and pushed to
originbefore. - You have a project that is currently in .git.
- You use WP Engine as your Managed Hosting Solution.
- You have at least a free account on Codeship.
What Should I Know Before Hand?
- Not much, this tutorial will work even if you already have files uploaded to WP Engine.
- This tutorial (and supporting shell script) will work even if you tried to deploy before but it didn’t go so well.
- Read about Preflight Repo Setup
- If this is your first time setting up automated deployments I suggest running through this walk through on a test install or deploying to staging.
Getting Started: Setting Up and Connecting Our Repo(s)
Preflight Repo Setup
When creating your repo, we encourage naming the repo using a simple folder naming convention. At Linchpin we typically use lowercase characters and replace any spaces ” ” with dashes “-“. Example: If your plugin is named “My Awesome Plugin” you would name the repo “my-awesome-plugin”. You don’t have to do this, but it’s helpful to have your repo name(s) match the environment variables we will be setting up later in this walk through. When the deployment script runs, it will use the REPO_NAME environment variable to name the folder that holds your plugin or theme when it is pushed to WP Engine.
Important Note: All assets/files within your repo should be within the project’s root folder. DO NOT include the wp-content, wp-content\plugins, wp-content\my-awesome-plugin folders, etc. The deployment script is setup to create all the appropriate folders as needed, within the wp-content folder hierarchy.
Setup Your Project(s) Codeship
Codeship considers each “repo” you have a project. You will need to repeat this process as needed for each repo you are pushing to WP Engine.

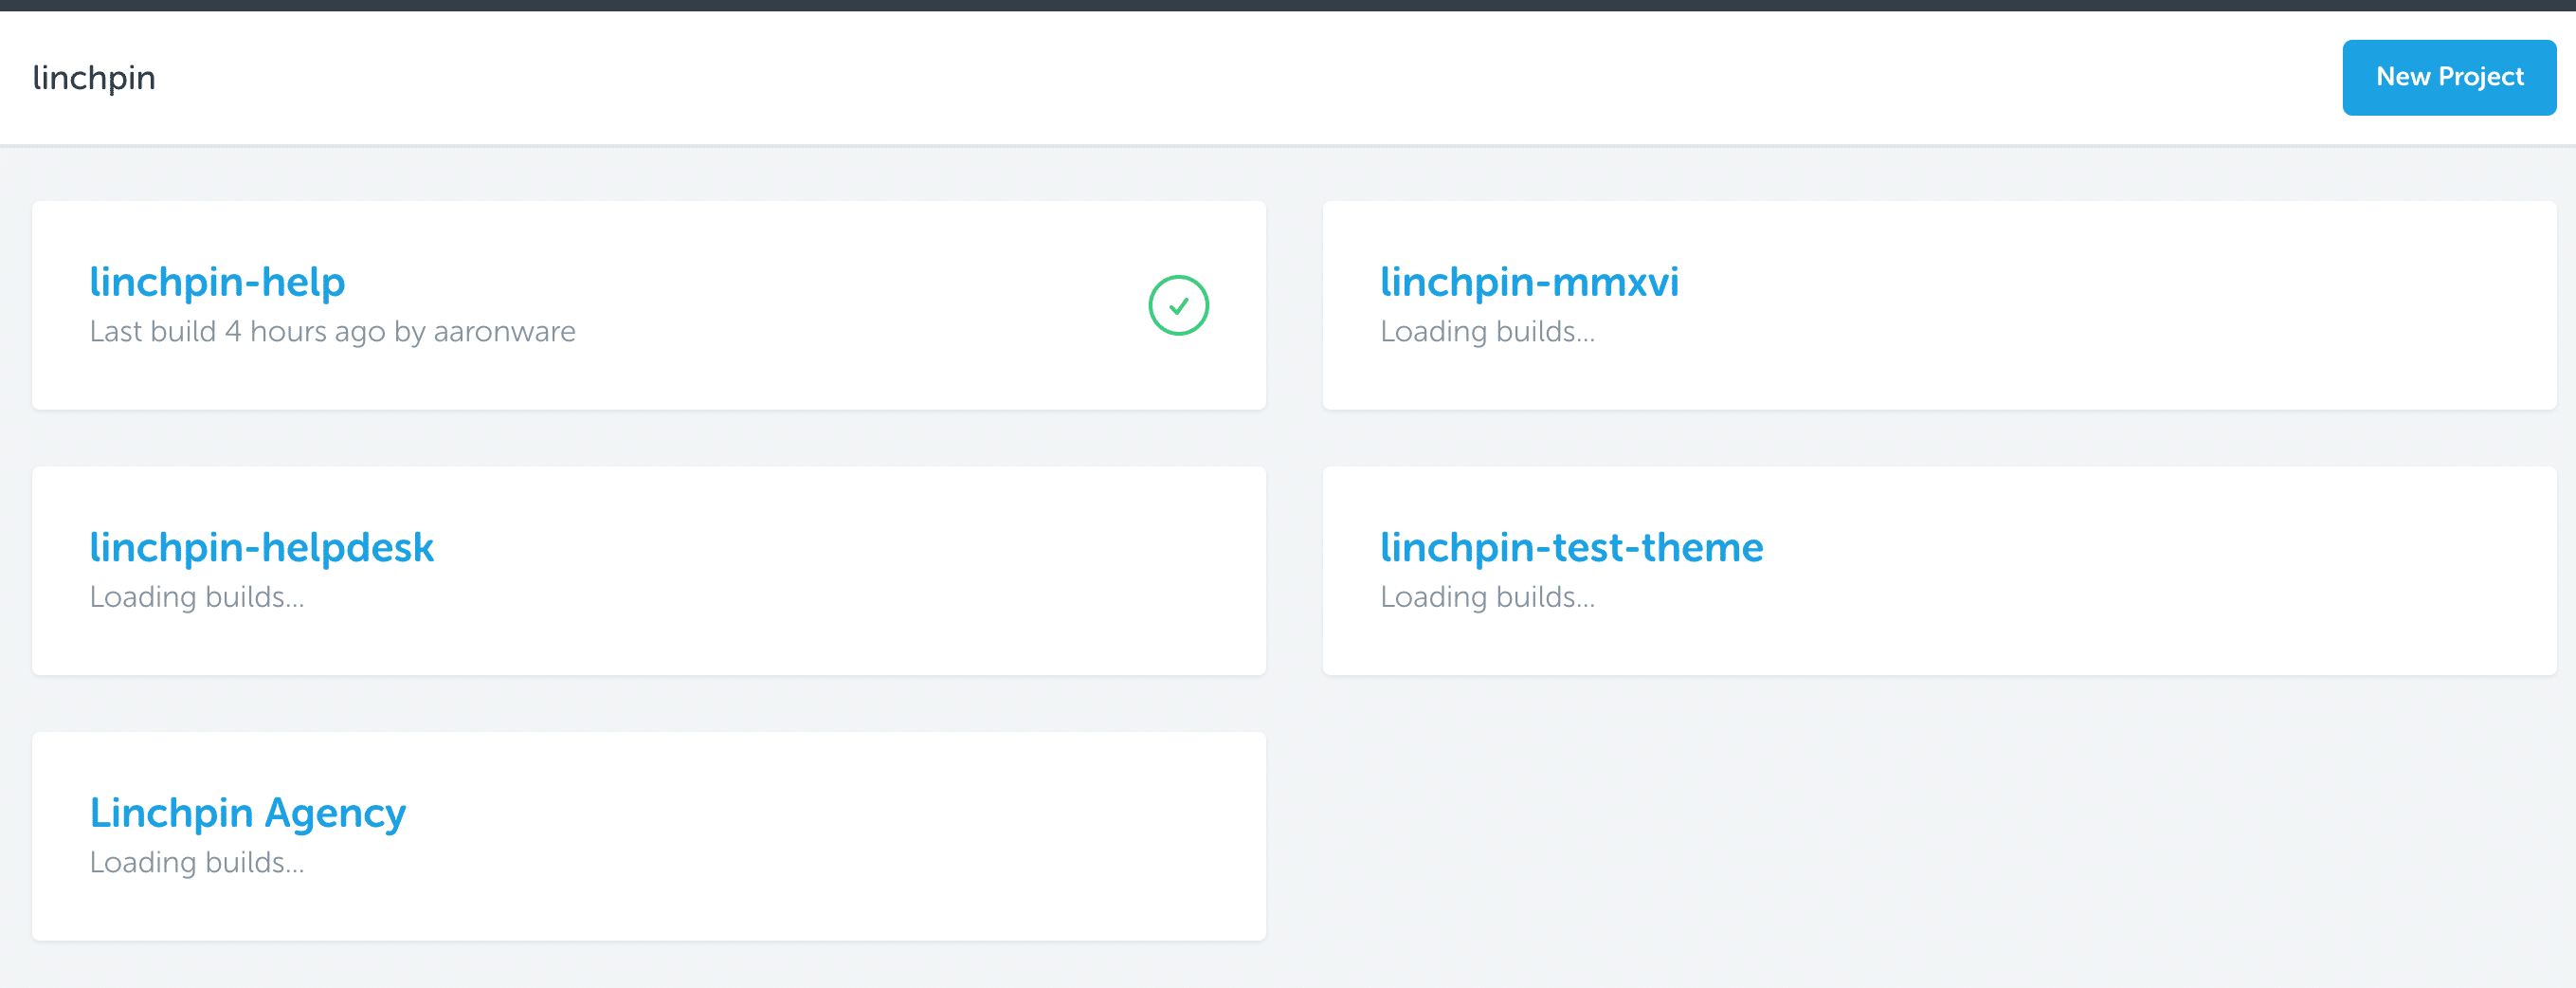
If you haven’t already done so, you will need to authorize Codeship to be able to connect to your SCM of choice. Once you select your provider you can then choose from one of your existing project repos. In the example screenshot you can see a list of projects we have available to select from. Codeship provides additional functionality for “Pro” builds, however this tutorial will keep it simple and use a “basic build”.
Setting up your WP Engine .git Push User
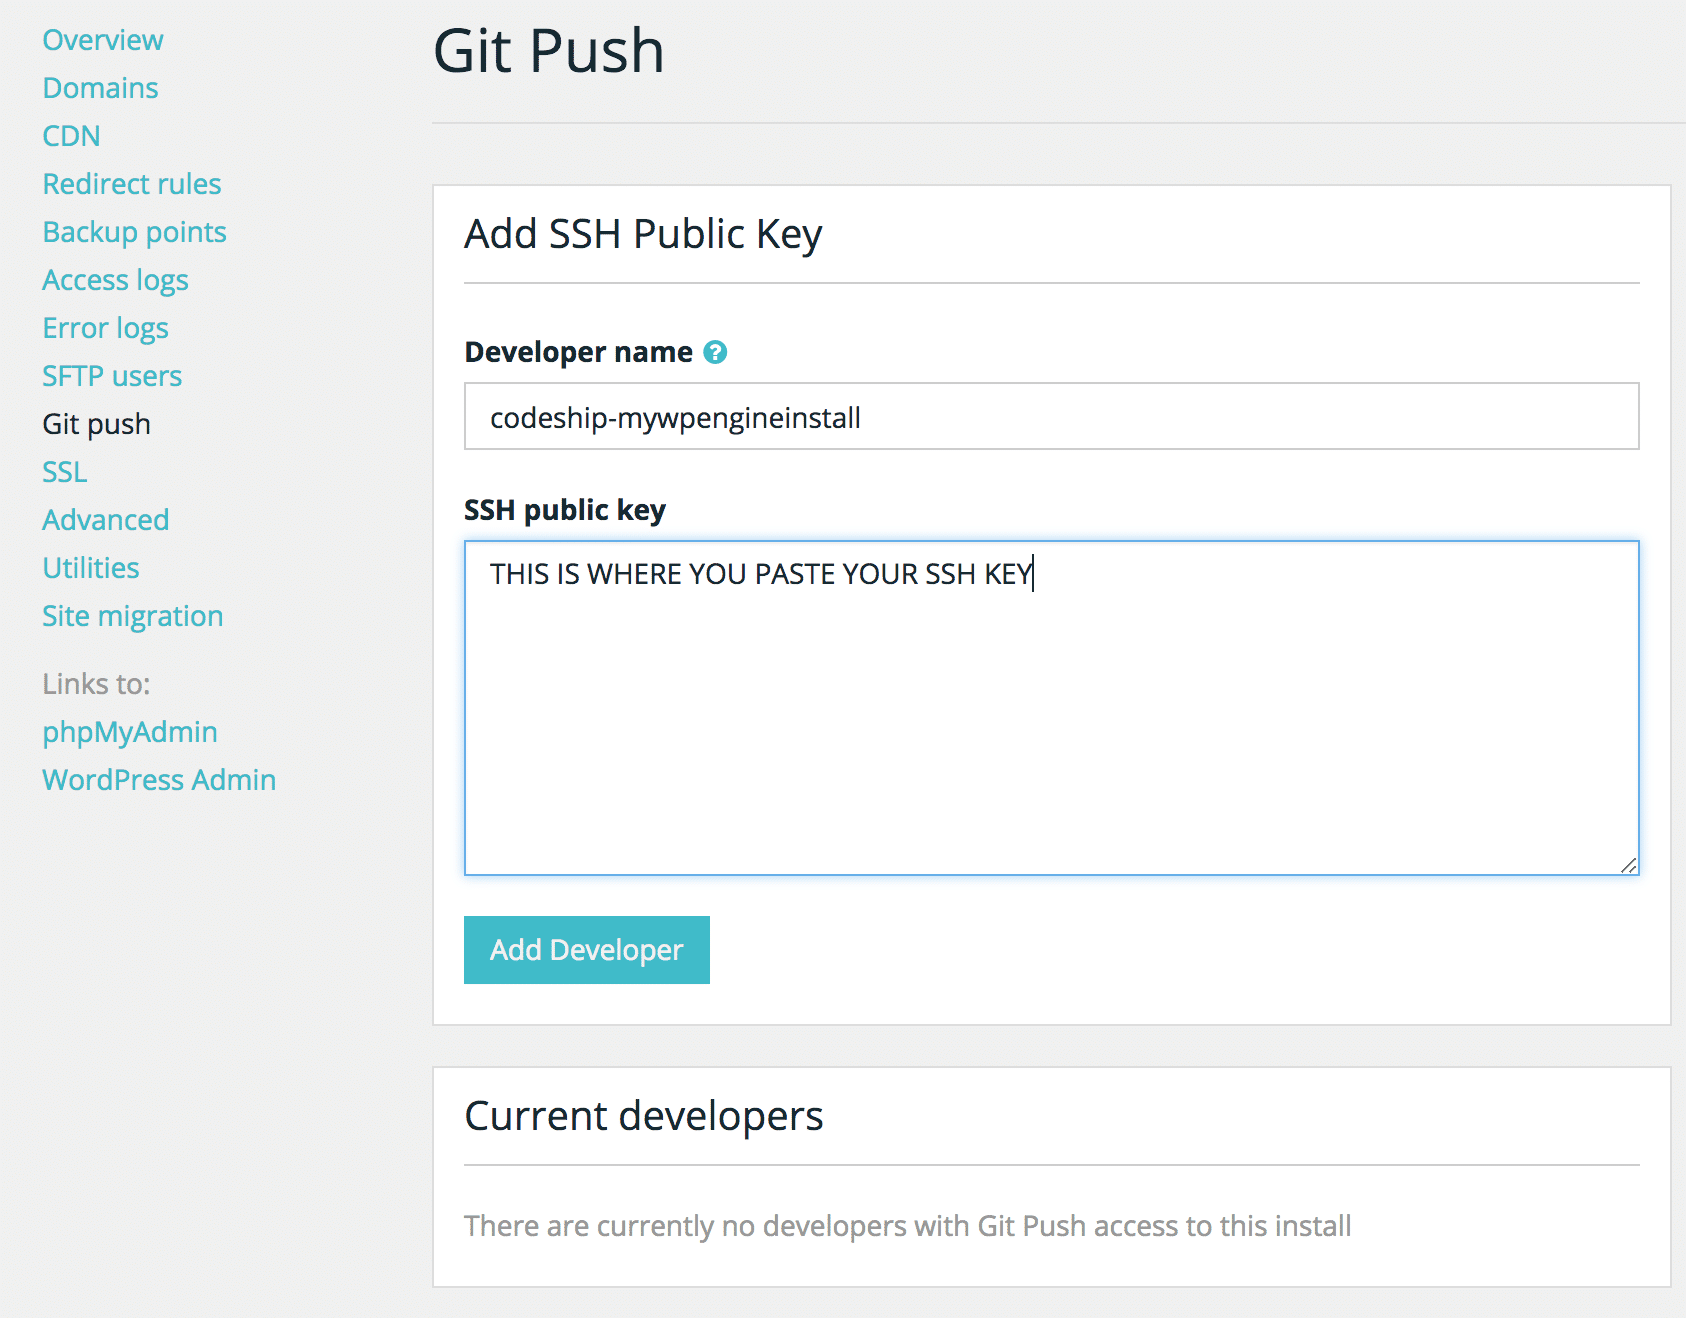
- Now that we created our project within Codeship, we need to connect to our WordPress install on WP Engine. Visit your Codeship project’s
General Settingspage and copy your Codeship Project’s SSH key to your clipboard. This step is better to complete early on in the setup because it can take up to 10 minutes or so for the .git user to be available within WP Engine’s provisioning system. - Paste your Codeship SSH key into the Git Push area of your WordPress install on WP Engine and give your codeship build a “user name”. The user name can be anything you’d like. We try to keep it relatively self explanatory. “installname-codeship-reponame”.

Setup Environment Variables Within Codeship
Environment variables are a great way to add flexibility to our build script without having sensitive information and/or customizations hard coded within this script.
You should never have any credentials stored within this or any other repo.
This is a list of environment variables available for usage within the deployment script.
| Variable | Description | Required |
|---|---|---|
| REPO_NAME | The repo name should match the theme / plugin folder name | ❗️ |
| WPE_INSTALL | The subdomain/install name from WP Engine (not including .wpengine.com) | ❗️ |
| PROJECT_TYPE | (“theme” or “plugin”) This really just determines what folder your repo is in | ❗️ |
| EXCLUDE_LIST | Custom list of files/directories that will be used to exclude files from deployment. This shell script provides a default. This Environment variable is only needed if you are customizing for your own usage. This variable should be a FULL URL to a file. See exclude-list.txt for an example | Optional |
Codeship Deployment Pipelines
Now that we have connected our repos and setup our environment variables, we can set up our deployment pipelines.
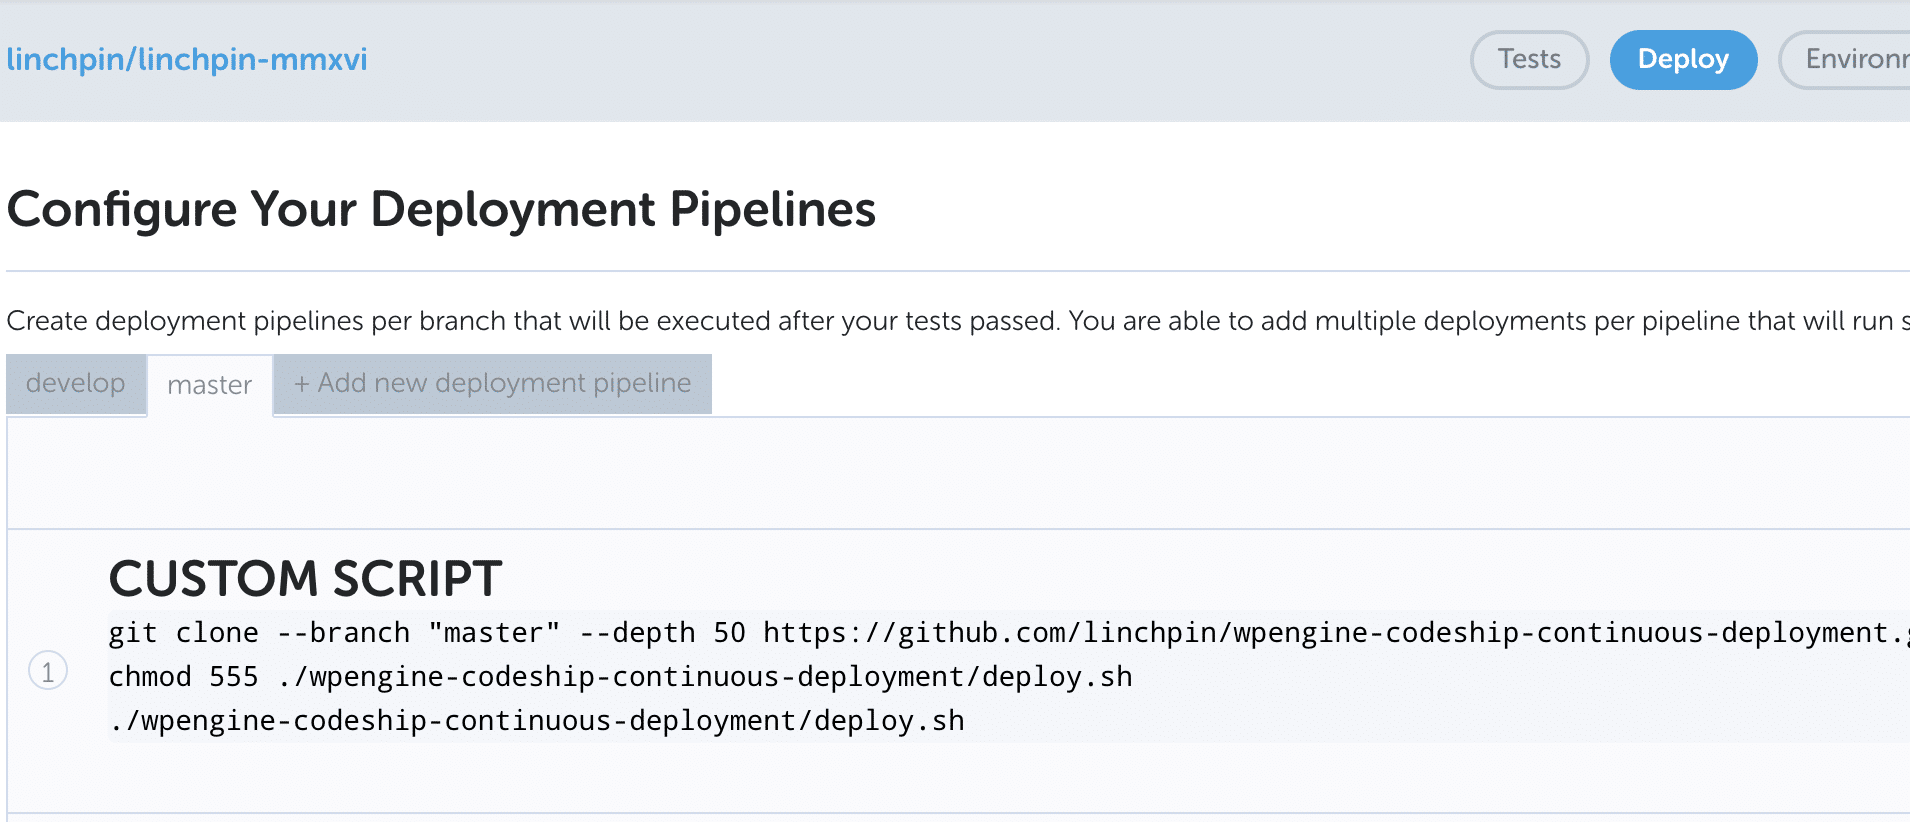 In this screenshot is an example deployment pipeline on Codeship that is using a custom script on the
 master branch of our Linchpin theme repo. Within your Codeship project settings, you will need to create at least one deployment pipeline. Typically you will have a deployment pipeline for each master and develop (You can have more). Your master branch will deploy to live/production and develop will deploy to staging. The pipelines you create are going to utilize the deployment script we have hosted on github (also seen below).
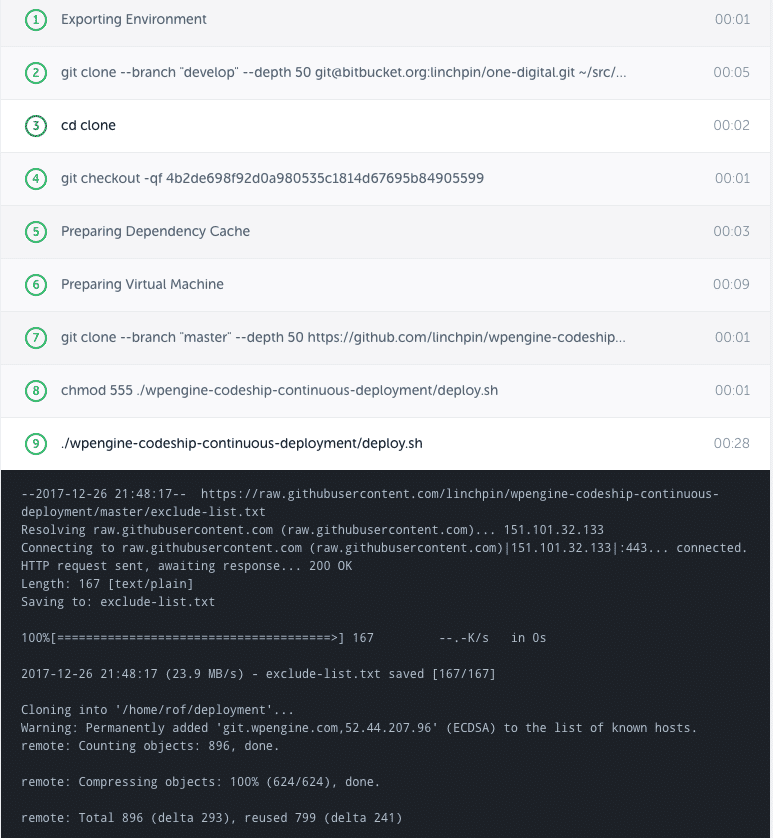
Doing Our First Push After Pipeline Setup
Now that we have created our first deployment pipeline, we are ready to push our first change to either our master or develop branches
The first time you deploy using Codeship it’s useful to view all deployment steps that are displayed within their help console.
Build Status
Codeship will notify you of your build status from their dashboard. Additionally, for bonus points you could push your notifications to a Slack channel to let your team know the status of the deployments.
❤️ We did it!
We have connected our repo(s) to Codeship, created our .git push user in WP Engine, setup our deploy pipeline(s) and pushed code!
Feel free to fork the project on github or create an issue for bugs, features, etc.
A similar article is on WP Engine’s Support Area. It might be worth a read as well.